Wood Burning Kit: A Creative Tool for Art and Craft Enthusiasts

Wood burning kits are popular among people who love crafts and DIY projects. Using a wood-burning kit, you can create beautiful designs, letters, and pictures on wood, making unique items like signs, decorations, and gifts. This art is also called pyrography, which means “writing with fire.” It allows people to express their creativity in a different way, with unique tools and techniques.
In this article, we’ll cover what a wood-burning kit is, the tools it includes, how to choose one, and some tips for safe and fun wood-burning projects. Whether you’re a beginner or someone looking to explore a new craft, a wood-burning kit can be a great addition to your creative toolbox.
What is a Wood Burning Kit?
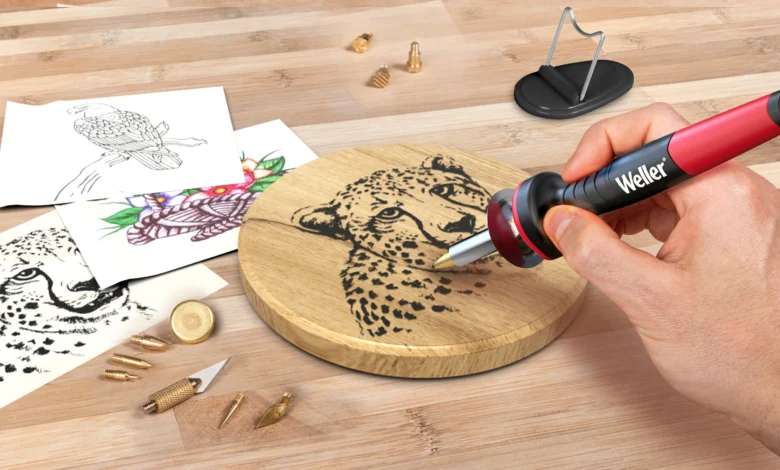
A wood-burning kit is a set of tools designed for burning designs onto wood. The main tool is a wood-burning pen, which heats up and allows you to burn lines, shapes, and textures into the wood. Kits usually come with different tips, or attachments, that can make various patterns, allowing you to create many different effects.
Wood-burning kits are versatile, making them useful for artists, crafters, and hobbyists. They are especially popular with those who enjoy handmade gifts or decorations. Using a wood-burning kit, you can create items like custom signs, coasters, jewelry boxes, and more. Some kits even work on leather, cork, and paper, giving you more creative options.
Tools Included in a Wood Burning Kit
Wood Burning Pen
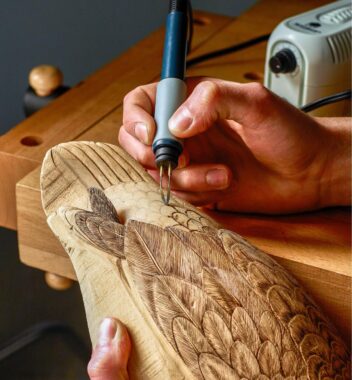
The wood-burning pen is the main tool in the kit. It is like a pen or soldering iron that gets hot and allows you to “draw” on wood by burning the surface. Most pens come with temperature controls, so you can adjust the heat for different types of wood and effects. Beginners often start with lower heat to get comfortable with the tool.
Different Tips
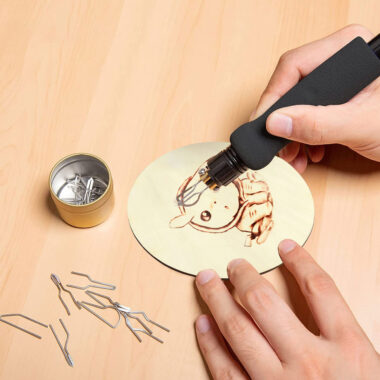
Most wood-burning kits include various tips or nibs that attach to the pen. Each tip has a unique shape, helping you create different designs. For example, some tips are pointed for fine lines, while others are flat for shading large areas. The variety of tips allows you to add detail to your work, from thin outlines to bold, shaded sections.
Safety Gear
Some wood-burning kits include safety items, like gloves or a stand for the hot pen. Safety is important because the pen can get very hot, and you need to be careful to avoid burns. A stand lets you place the pen down safely when you’re not using it. If a kit does not include safety gear, it is wise to purchase these items separately to stay safe.

How to Choose the Right Wood Burning Kit
Skill Level
When choosing a wood-burning kit, consider your skill level. Kits for beginners are usually simpler, with easy-to-use pens and basic tips. Advanced kits have more features, like multiple tips and temperature control, which can help create detailed designs. If you’re new to wood burning, a beginner kit may be a better choice until you get comfortable with the basics.
Types of Projects
Think about the projects you want to create with your wood-burning kit. Some kits are ideal for small projects, like coasters or keychains, while others have tools for larger items, like signs or cutting boards. Choosing a kit that matches your project needs can make wood burning easier and more enjoyable.
Price and Quality
Wood-burning kits come in various price ranges, and quality can vary as well. Higher-quality kits are often more durable and offer better temperature control, which is important for achieving consistent results. While it might be tempting to buy a cheaper kit, investing in a reliable one can make a big difference in your experience and the quality of your work.
Tips for Safe and Successful Wood Burning
Work in a Well-Ventilated Area
Wood burning produces smoke, which can be harmful if inhaled in large amounts. Always work in a well-ventilated area, like near an open window, or consider using a small fan to blow the smoke away from your face. This will keep the air fresh and help you breathe more easily while working on your project.
Practice on Scrap Wood
Before starting on your main project, practice on a piece of scrap wood. Practicing will help you get used to the wood-burning pen and understand how different tips work. This is especially helpful for beginners, as it lets you gain confidence and control over the tool before working on your actual project.
Use Safety Gear
Wood burning can be dangerous if not done carefully, as the pen gets extremely hot. Wear gloves to protect your hands, and use a stand to safely place the pen when not in use. Make sure children are kept away from the work area to avoid accidents.
Conclusion
Wood burning kits open up a world of creativity for people who enjoy crafting and making art. With a basic kit, you can transform plain pieces of wood into beautiful art, unique gifts, and home decorations. By choosing the right tools and practicing safe techniques, wood burning can become a rewarding hobby that allows you to express your ideas in a new and exciting way.
Whether you’re a beginner or someone with more experience, a wood-burning kit provides many opportunities to create and learn. From selecting the right kit to following safety tips, this guide should help you get started on your wood-burning journey. With practice, you’ll be able to create detailed designs that showcase your style and creativity.

FAQs
Q: What is a wood-burning kit used for?
A: A wood-burning kit is used to create designs, letters, and images on wood by burning the surface with a heated tool.
Q: Can beginners use a wood-burning kit?
A: Yes, many kits are made for beginners and come with easy-to-use tools and instructions for starting projects.
Q: Is wood burning safe for kids?
A: Wood burning requires a hot tool, so it’s recommended for adults or older teens under supervision, not young children.
Q: Do I need special wood for wood burning?
A: Softwoods like pine or basswood are easier to burn, but most types of untreated wood can be used for wood-burning projects.
Q: How do I clean the tips of my wood-burning pen?
A: You can clean tips with fine sandpaper or a brass brush to remove residue, keeping them in good condition for future use.


